Have you ever been insecure while you are using any public WIFI? Did you suspect someone sniffing on your network, stealing your credential, phishing your network?
All of these might happened if you’re using any WIFI connection in a coffee shop, a cafe, a coworking place, in a conference room, on your own office, or maybe in your neighborhood.
Of course, you can prevent this by using a VPN on a public network, but sometimes it just can’t work, or maybe you are just too cheap for that expensive VPN subscription. If this happened, this Raspberry Pi (RPi) hack box could be a low-cost alternative to protect you from cyberattacks which might come in handy another day.
So let’s get started
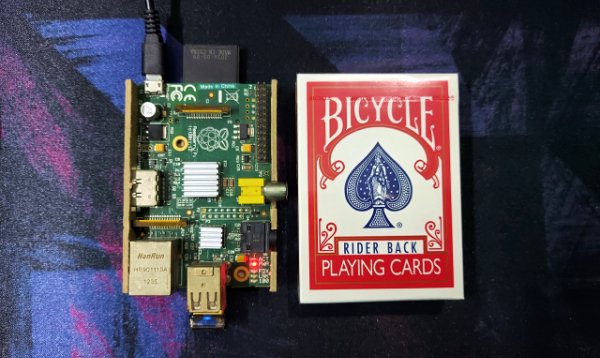
The RPi that I’m going to use is the 1st gen model B version. It is an advantage that the 1st gen doesn’t need a lot of electrical power, so you can plug it into a laptop, power bank, or phone charger. The current that comes from those appliances probably these days would be around 3 Ampere that was more than enough.

I’m using SanDisk 16 Gb micro sd, two heatsinks because it’s overclocked, and a wireless adapter from Edimax (EW-7811Un) because the 1st gen doesn’t have any built-in wifi yet, so you need one.
The last thing you need to get is the Kali Linux ARM image from their site, flash the image to the sd card either using dd (careful accidentally erasing your laptop drive) or an app such as Etcher just to be safe. The size of the image is quite big approx 2Gb so it would take a longer time to flash, please be patient.
You can read how to flash from the Kali Linux site, it’s explained very well. Just follow the step-by-step instructions.
The current kernel version by the time this article is written, 5.4.83-Re4son
One-time configuration
I’m going to make a headless RPi, so it’s going to be a plug n play device. But first, we need to set an autologin and enabling the SSH, it is a one-time configuration so you don’t need to repeat it.
When you’re in a new public WIFI you might want the RPi to auto-connect to your phone WIFI hotspot, so then you could SSH to the RPi from your phone then switch to the new public WIFI.
Enable SSH
From your macOS or PC, mount the sd card and then create a blank file named SSH on the mounted folder and do not add any extension to the file.
|
|
Linux PC
Linux could easily mount the image Linux root folder and add all the configuration files directly to that image file.
macOS or Windows PC
Unless you want to follow these two solutions you can skip the last solution,
- Follow the instruction on the Github page of fuse-ext2. You can read/write on ext2, ext3, and ext4 partitions.
- Or you can pay for “extFS for Mac” by Paragon Software
Last resort, boot the SD card from the RPi, plug in your monitor and keyboard, wait until you get to the login GUI, press CTRL + ALT + F1 to get to the shell-based interface, and then login as a user kali with a password kali.
User Autologin
The WIFI connection only works for successful login, the RPi is going to be headless without having to use the GUI, so we need to set autologin for the default user kali, to do that we need to configure the lightdm
|
|
Find the seat configuration and uncomment these options,
|
|
Add your phone WIFI hotspot configuration
Let’s say your phone WIFI ap is myPhoneWIFISSID and password is myPhoneWIFIPassword
Create a myPhoneWIFISSID.nmconnection file, name this file the same as your WIFI SSID.
|
|
Copy-paste this configuration and edit as needed, usually, you only need to change the connection.id, wifi.ssid, and the wifi-security.psk
|
|
If you notice autoconnect-priority=99 the RPi will always connect to your phone hotspot if it’s available, keep in mind that you’re going to use this configuration every time you need to add a new WIFI network, so you might want to keep a note.
To add a new WIFI ap you need to SSH from your phone, and then use the nmcli tool
|
|
e.g. to add RIFA WIFI then you need to create RIFA.nmconnection file with the WIFI credential, don’t forget to set the autoconnect-priority lower than 99.
And then try to connect to the WIFI, after changing the connection, your current SSH connection will close or hung up.
|
|
I guess this is all roundup, you can now use the RPi as a plug n play hack box device and play with the kali Linux tools provided.
- Turn on your mobile hotspot
- Power on the RPi, it should auto-connect to your phone hotspot
- Check for the RPi IP from your phone through your hotspot management, e.g.
192.168.8.156 - And then SSH to the RPi using any SSH client from your phone.
ssh kali@192.168.8.156 with password kali.
There are lots of tools on Kali Linux such as you can detect if someone is on the network doing a MITM attack, network packets monitoring, assessing the public WIFI, etc. Maybe on another article.
The quieter you become, the more you are able to hear ~ Kali Linux
