
Hi, this is actually my depression in finding a wrist pad that I can adjust accordingly to the height of the keyboard. I’ve been googling around, going back and forth on any e-commerce sites but still couldn’t find anything to my preferences.
So I came up with an idea to make my own, I’m starting to research for any wrist pad product out there. I’m focusing on the size of the wrist pad, the height, the length, and the thickness.
This project doesn’t need any specific tool, do not let your creativity down because you miss a tool. The type of wrist pad I’m going to make is the same size as the length of A4 paper. Fortunately, I have some A4 cardboard leftover with 2 mm thickness, so I thought this is going to be a good fit for the project.
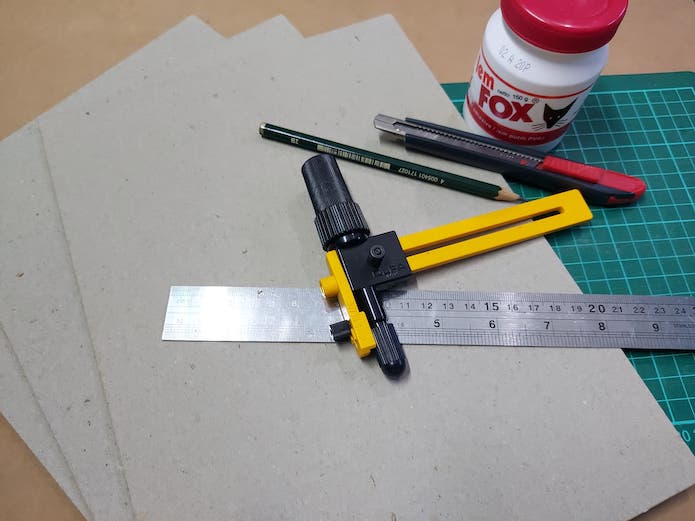
As you see, you’d need 2-3x A4 cardboard (2mm thick), repositionable glue, cutter, pencil, ruler, cutting mat, and lastly, a round cutter, or a hole puncher or if you want it square, triangle or else then you don’t need this tool.
As I can remember, It took me for approx 30-45 minutes to finish the project, well actually it depends on how crafty you are. FYI if you have kids around I suppose you need to pause the project because this project will need a bit of precision, concentration, and also you’re playing with sharp tools.
Cut The Cardboard
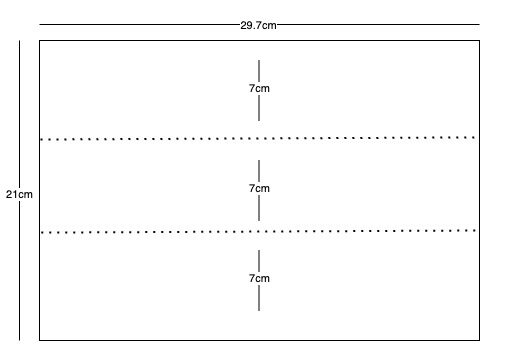
First, you need to cut each cardboard into 3 parts of 7cm x 29.7cm. I actually only use 7 parts, I kept the rest in case I messed up.
Stack The Cardboard
Get all the 7 parts into a stack so it will form a rectangle block, you may want to number each cardboard from 1st top to 7th bottom stack, don’t mark each side, just a small mark at the top right corner will do. This stack will roughly have 1.5cm thickness combined, if you want it thicker then you can use all the parts.
Draw a Hole Pattern
Before creating the plughole, we need to first draw a pattern for the cutting hole, use the guideline below.
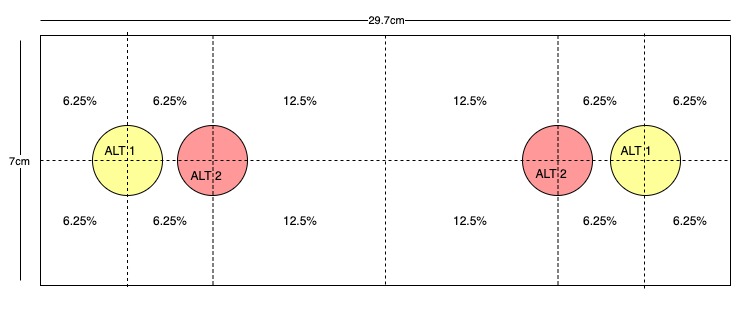
Draw the dashed line pattern with your pencil, divide all the area as described, your cutting hole should be in the center of the intersection line. You’re going to cut the hole alternately between yellow and red. The cutting hole diameter depends on your preferences as long as not overlapping between the cutting hole.
Cut The Plug
So here comes the tricky part, you’re going to make a plug on each part of the cardboard alternately.
I recommend starting from the bottom of the stack which is the 7th stack. Cut the yellow holes and after that make sure the cut round caps can be easily unplugged.
Lay the 7th stack on the table, plug back the caps to the hole and then put glue on the top of both caps, just the top of the cap, don’t glue any of the surrounded areas.
And then, put the 6th stack on top of it, you may need to reposition for alignment, press it for a while until the hole caps from the 7th stack glued to the bottom side of the 6th stack, and then release the 6th stack.
Now the 6th stack will have 2 caps glued on the bottom side that will fit the hole on the 7th stack, and then you’re going to cut the red hole on the 6th stack and glue the caps to the 5th stack.
Repeat this way alternately between yellow and red holes until you reach the top of the stack.
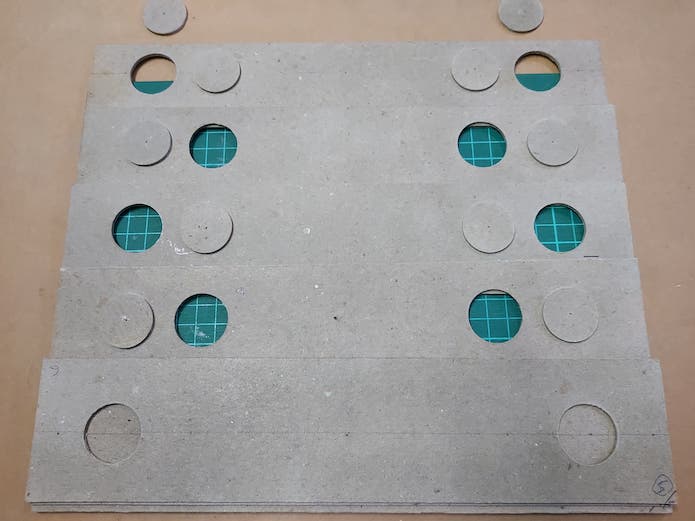
Final Result
So here is the result, I’ve done some customization for a 2mm width staircase, I don’t use any precise size, only with a hunch.
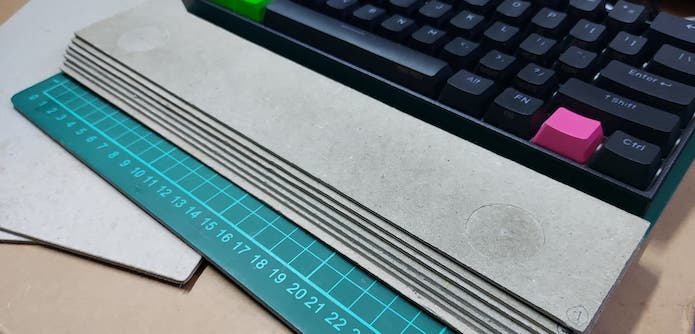
I’m currently happy with the result, maybe you can put some paint art on it, if you have a sweaty wrist, you may need to spray the cardboard with acrylic paint to prolong the usage.
I think frugality drives innovation, just like other constraints do. One of the only ways to get out of a tight box is to invent your way out.
~ Jeff Bezos